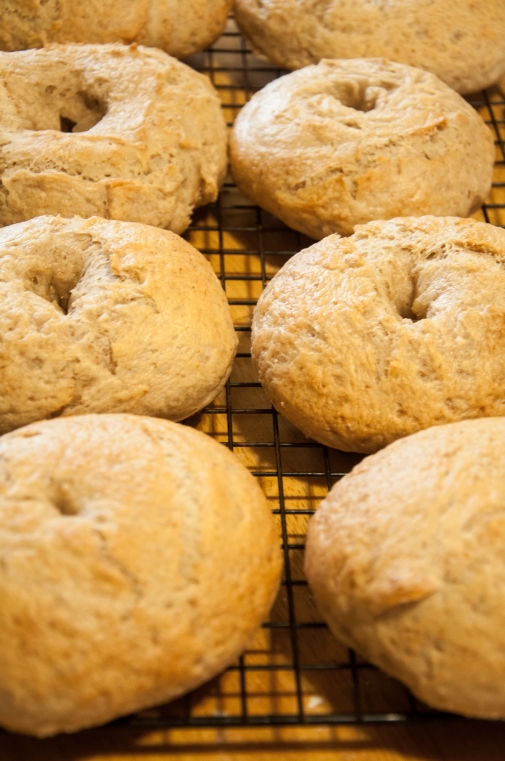
Honey Fruit Cake

honeycake

I end up creating this desserts and meals that I would have never thought of before, usually when I have other things to do that I don’t want to do. Mostly throwing together a bunch of ingredients and hoping that it turns out yummy. I nail it about 99% of the time, I won’t sat 100% because I have had some really big bombs before. But I will never admit that out loud. lol

But I digress, I wanted to make something that would make me feel warm and remind me that spring and summer were just around the corner. I love the winter but only when it snows and I live in an area where it doesn’t snow just get cold. 😦

The warm smell of honey and vanilla just makes your smile and then the burst of fruit flavor in every bite reminds you of the warmer weather that is coming. Even if you frozen fruit it still tastes yummy. 🙂

I used strawberries, blueberries, raspberries, cherries more for the mixed fruit. Another yummy combo would be peaches and strawberries. I think that might be my next cake. 🙂

Warm Honey Fruit Cake

Ingredients:

  • 1 1/2 cups flour
  • 1 cup sugar
  • 2 Tbs honey
  • 1 1/2 ts baking powder
  • 1/2 cup milk
  • 1 cup mixed fruit, fresh or frozen
  • 1/8 ts salt
  • 3 Tbs butter, melted

Directions:

  1. Pre-heat oven to 375ËšF
  2. In a medium bowl comine flour, egg, sugar, honey, milk, baking powder, butter. Mix until everything is combined.
  3. Use a spring form plan. Spray the side and bottom of the pan. Pour cake batter into pan.
  4. Sprinkle fresh or frozen fruit on top of the cake. Do not press the fruit down.
  5. Place in the oven on the middle rack. Bake at 375ËšF for 30-45 minutes or until done. Once baked cool cake on wire rack.

Chocolate Souffle

chocolatesouffle

When you hear the word souffle, what do you think of? Something tall, elegant and sinfully tasty or does it make you cringe at the thought cause it sounds fancy. I hear challenge excepted! I have been watching way to much How I Met Your Mother. 🙂

I made a triple berry souffle once to keep my kids happy during one of their school vacations last year and it didn’t seem hard. I had never made a chocolate one though. And given my love for chocolate seemed to me a little weird. I mean I LOVE chocolate. If there was a chocolate anonymous meetings I would be the spokes person.

So I knew that I had to change that. I had to make one and so I did. Plus I love using my ramekins for things other then dips! I looked at tons of different recipes trying to figure out what I should do. Again no two recipes were the same but the how you made them was close. So I took several different recipes and smashed them together into one yummy tasting chocolate souffle. 🙂

I started to have my kids taste everything as it was being made, I got responses like, “Needs more chocolate” or my favorite from my husband, “Less chocolate more vodka.” You would think that is an odd response but not in my house. I use real vanilla extract. But that is a recipe for a different day. 🙂

Chocolate Souffle

Ingredients:

  • 1/4 cup sugar, plus more for baking dish
  • 8 ounces (1 cup) semisweet chocolate chips
  • 1 teaspoon pure vanilla extract
  • 3 large egg yolks
  • 4 large egg whites
  • 1/4 teaspoon lemon juice

Directions:

  1. Preheat oven 350ËšF degrees. Lightly butter or spray a 1 1/2-quart tall-sided baking dish or 4 10oz ramekins. Coat with sugar, tapping out excess. Set dish on a rimmed baking sheet.
  2. In a large glass bowl set over a pot of simmering water, combine chocolate, vanilla, and 1/4 cup water. Stir until chocolate is melted and mixture is smooth. Remove from heat and let cool to room temperature.
  3. Stir egg yolks into cooled chocolate mixture until well combined. Set souffle base aside.
  4. In a large bowl, using an electric mixer or a stand mixer, beat egg whites and lemon juice on medium-high until soft peaks form, about 2 minutes. Gradually add sugar and beat until stiff, glossy peaks form, about 5 minutes (do not over beat).
  5. With a rubber spatula, gently cut fold in half of the egg white mixture. Down through center and lift up some base from bottom of bowl. Turning bowl, steadily continue to cut down and lift up base until just combined. Add in the second half and repeat.
  6. Transfer mixture to dish or ramekins, taking care not to get batter on top edge of dish; smooth top. Bake souffle until puffed and set, 30 to 35 minutes. Do not open oven during first 25 minutes of baking. Serve immediately.

Note: The souffle will start to loose it’s height as it starts to cool off.

Serving Tip: You can dust the top with powder sugar or pop the center and fill it with either chocolate or vanilla sauce. Either way you can’t go wrong.

Chocolate Chip Brownies

brownie


I have never been one to pass up chocolate, expect if it has nuts in it. I hate nuts and waiting for the brownies to come out of the oven. And how do you make an already yummy treat even better? Add more chocolate. Chocolate chips and a silky smooth mocha glaze. YUMMY!!

I blame my sweet tooth on my parents. I can ‘sneaking’ into my dad’s top dresser draw and taking his chocolate cover cherries during the holiday’s. But I would never open the box first, I waited until it was open. Or getting that chocolate bar when I went food shopping with mom.

I think I have a chocolate problem. I wonder if they have a support group for chocolate lovers?

Chocolate Chip Brownies

Ingredients:

  • 3/4 cup cocoa
  • 1/2 teaspoon baking soda
  • 2/3 cup butter, melted and divided
  • 1 cup boiling water
  • 2 cups sugar
  • 2 eggs
  • 1-1/2 cups all-purpose flour
  • 1 teaspoon vanilla extract
  • 1/4 teaspoon salt
  • 1 cup Semi-Sweet Chocolate Chips

Directions:

1. Heat oven to 350°F. Grease 13x9x2-inch baking pan or two 8-inch square baking pans.

2. Stir together cocoa and baking soda in large bowl; stir in 1/3 cup butter. Add boiling water; stir until mixture thickens. Stir in sugar, eggs and remaining 1/3 cup butter; stir until smooth. Add flour, vanilla and salt; blend completely. Stir in chocolate chips. Pour into prepared pan.

3. Bake 35 to 40 minutes for rectangular pan, 30 to 35 minutes for square pans or until brownies begin to pull away from sides of pan. Cool completely in pan on wire rack. Garnish with chocolate chips, if desired. Cut into squares. Makes about 24 brownies.

Glaze:

Ingredients:

  •  1 cup chocolate chips
  • 1/4 cup milk
  • 1 ts vanilla
  • 2 ts coffee

Directions:

  1. In a small sauce pan stir all ingredients together over low heat until well combined.
  2. Pour over warm brownies and let cool


Great Tasting Bagels

Fresh from the oven

Fresh from the oven

I am a bagel addict. I love bagels! The perfect bagel is crunchy on the outside and yet chewy on the inside. You can top them with eggs and cheese, jam, jelly, cream cheese or even make sandwiches from them. The bagel is a universal food. 🙂 A blank canvas, if you will, that has endless possibilities.

I have two ways I love bagels. Toasted with butter and as a breakfast sandwich with eggs, ham and cheese.

If you think what is needed to make bagels, I bet you already have most of everything that you need. At most you will need yeast, so you can spend $0.99 for a pack of 3 or $3.49 for a jar that you can use over and over again. After all is said and done your homemade bagels come to $0.12 per bagel or you can spend $3.99 for a package of 8 and  have it come to $0.50 per bagel with all those extra additives. You can make 8 bagels for $0.99 or buy them for $3.99. Saving $3 per 8 bagels. And the cost will just go down if you buy the yeast in bulk.

Now you see in my recipe that I used honey instead of sugar and changed out 1/2 cup of all purpose for wheat flour. I just liked the flavor it gave better. You can use sugar and 100% all purpose flour if you want. The bagels take about 2 hours to make from start to finish. But the good news is that most of that is waiting time. 🙂

New York Style Bagels


  • 2.25 teaspoons of active dry yeast (one pack of yeast)
  • 1 ½ tablespoons of honey or sugar
  • 1 ¼ cups of warm water, divided
  • 3 cups of all purpose flour or bread flour (will need extra for kneading)
  • 1 ½ teaspoons of salt
  • ½ cup wheat flour


Directions:

  1. In ½ cup of the warm water, pour in the sugar and yeast. Give a quick stir to mix everything. Let it sit for five minutes, until it all dissolves in the water. Should be very bubbly.
  2. In a large bowl mix the flour and salt. Make a well in the middle and pour in the yeast mixture.DSC_0081
  3. Pour 2/3 cups of warm water into the well. Mix and stir in the rest of the water as needed. Depending on where you live, you may need to add anywhere from a couple tablespoons to about ¼ cup of water. You want to result in a moist and firm dough after you have mixed it.
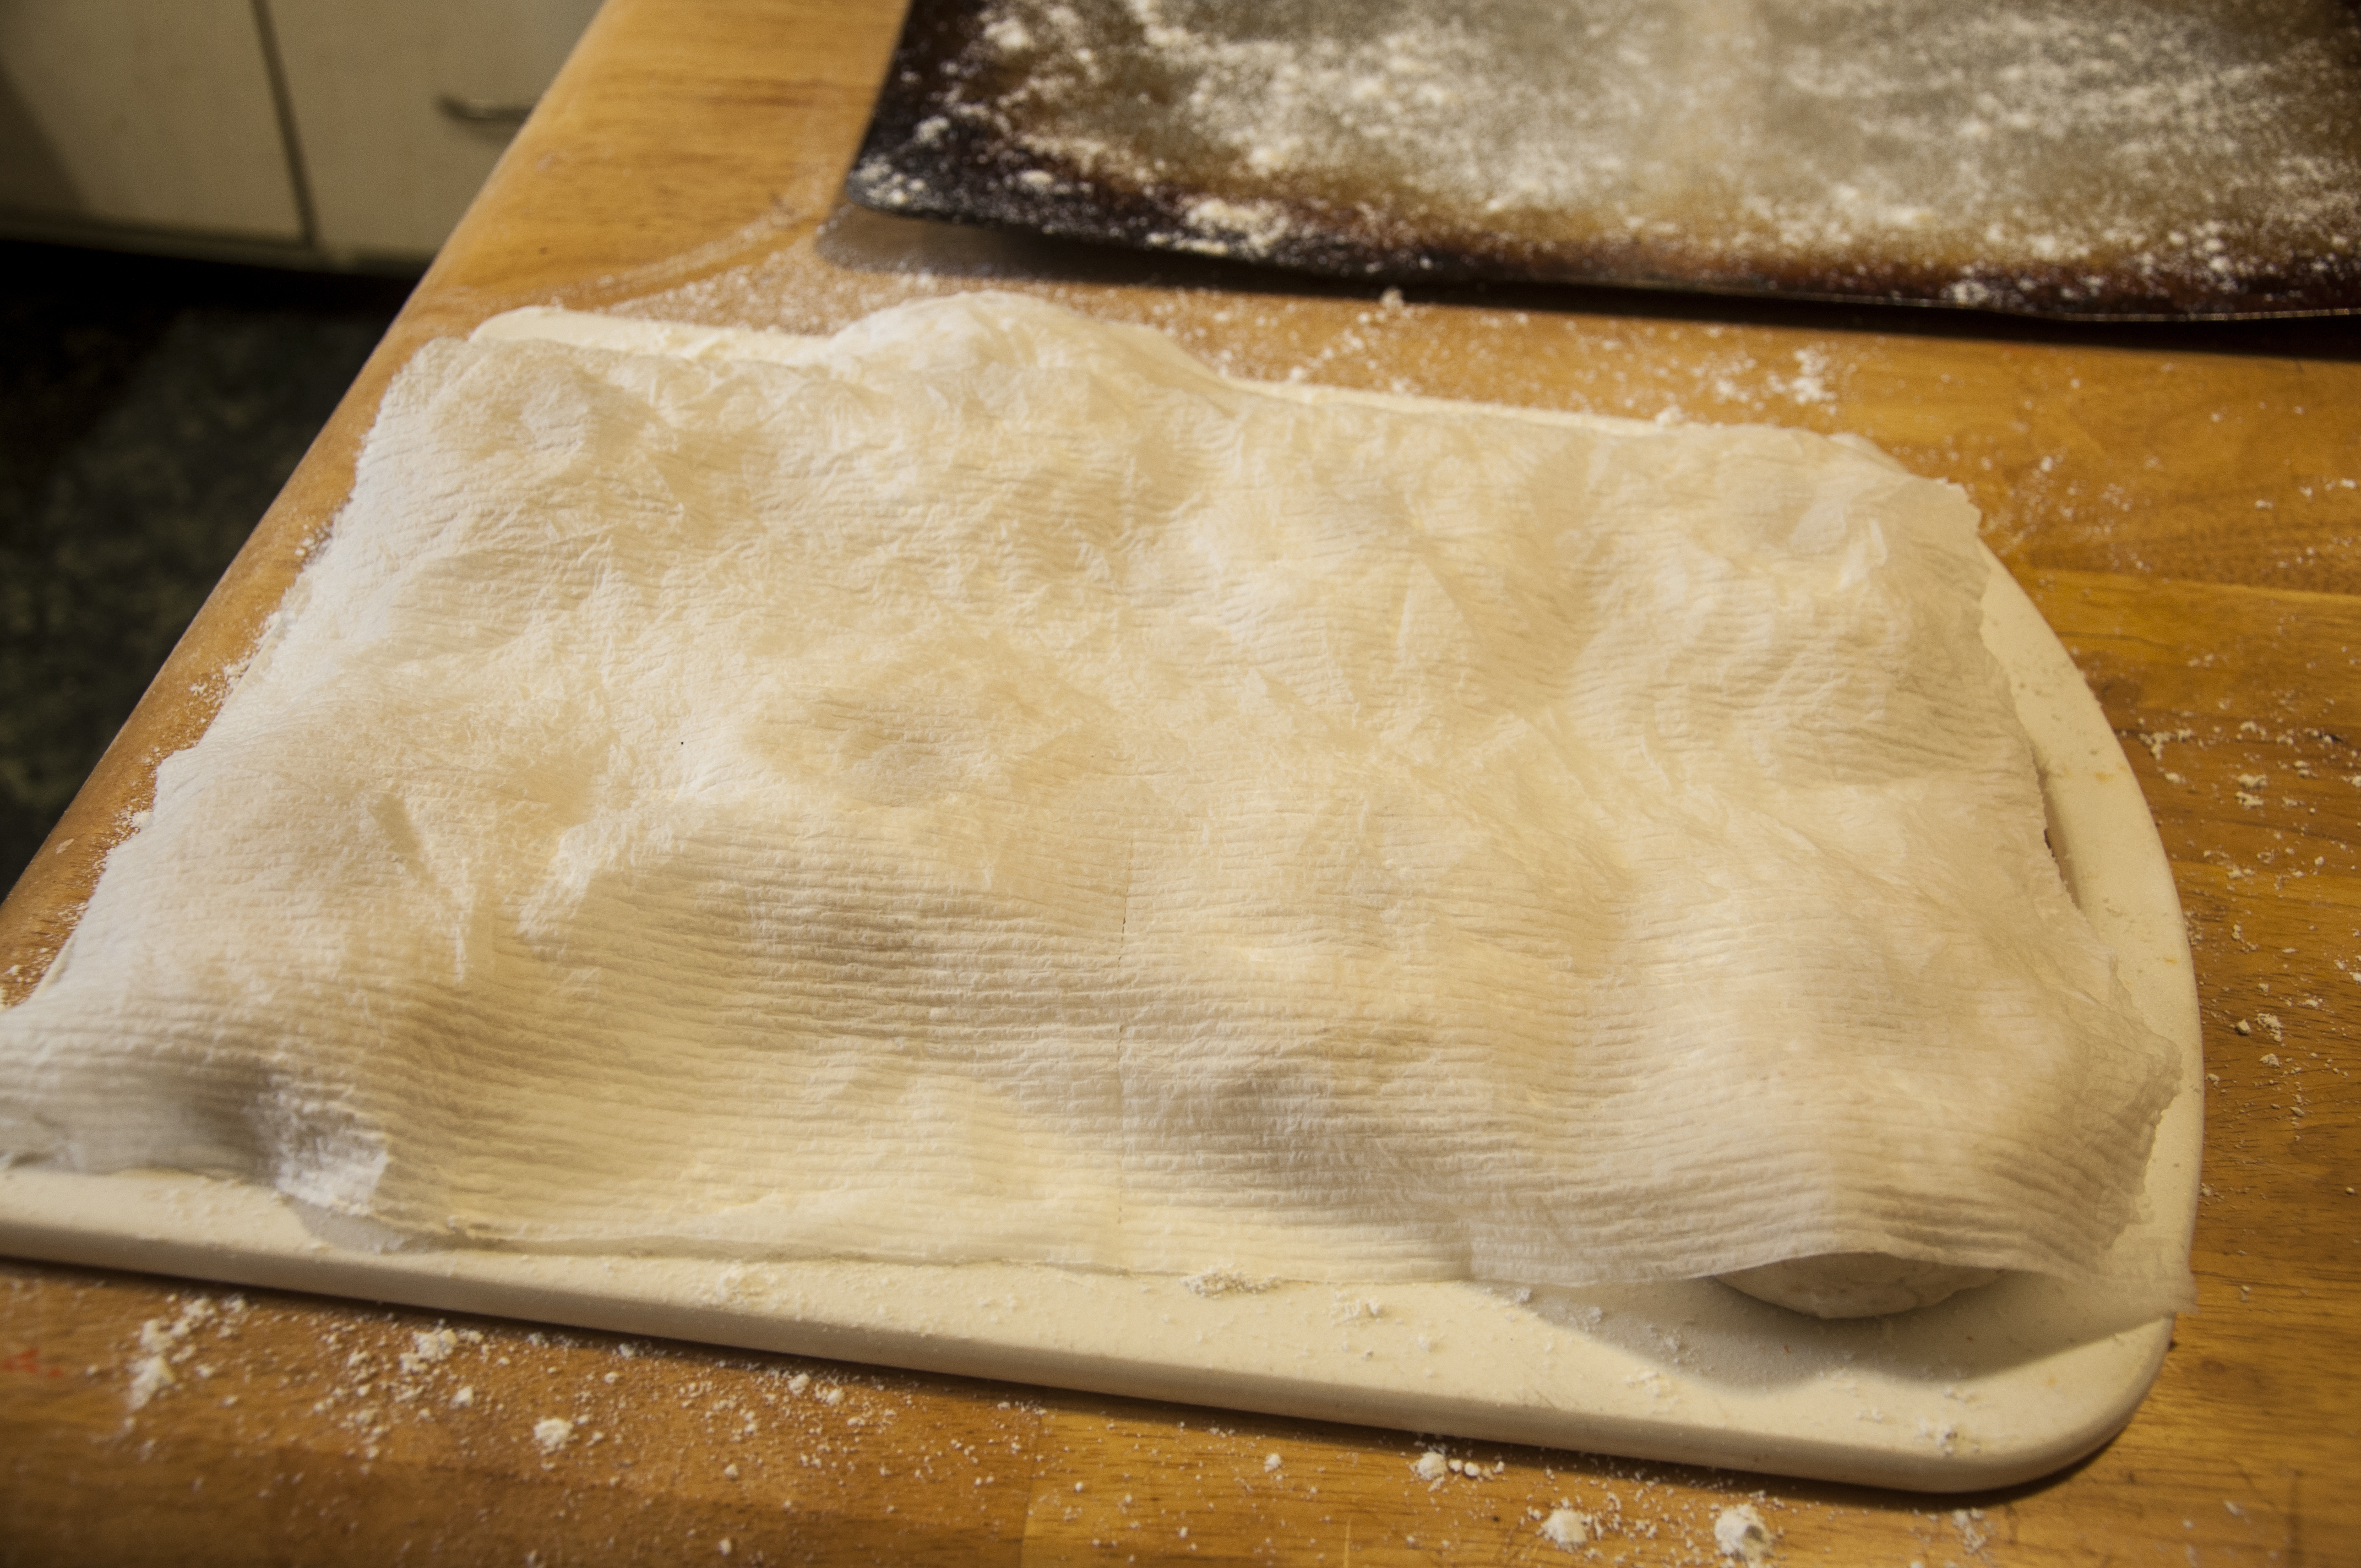
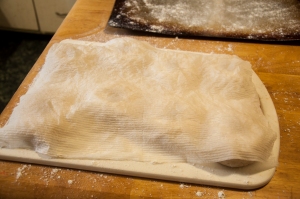
  4. On a floured countertop, knead the dough for about 10 minutes until it is smooth and elastic. Try working in as much flour as possible to form a firm and stiff dough. Hint: Spray the table top with water then cover with plastic wrap. This will help keep your surface clean and makes for easy clean up when you are done.
  5. Lightly brush a large bowl with oil. Turn the dough in bowl to coat. Cover the bowl with a damp dish towel. Let rise in a warm place for 1 hour, until the dough has doubled in size. Hint: I put the oven on let it warm up to 170Ëš then I turn it off and place the dough to rise in the oven. Works great.DSC_0087
  6. Punch the dough down, and let it rest for another 10 minutes once dough is done rising. DSC_0092
  7. Carefully divide the dough into 8 equal pieces. To shape each piece into a ball, press it gently against the countertop moving your hand and the ball in a circular motion pulling the dough into itself while reducing the pressure on top of the dough slightly until a perfect dough ball forms. Repeat until you have 8 dough balls.DSC_0097
  8. Coat a finger in flour, and gently press your finger into the center of each dough ball to form a ring. Stretch the ring to about â…“ the diameter of the bagel and place on a lightly oiled cookie sheet. Repeat the same step with the remaining dough.DSC_0101
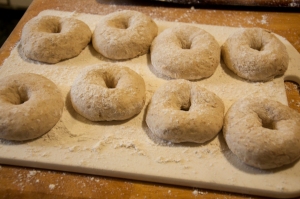
  9. After shaping the dough into balls, place them on the cookie sheet, cover with a damp kitchen towel and allow to rest for 10 minutes. DSC_0104
  10. Bring a large pot of water to a boil. Reduce the heat. Use a slotted spoon or skimmer to lower the bagels into the water. Boil as many as you are comfortable with boiling. Once the bagels are in, it shouldn’t take too long for them to float to the top (a couple seconds). Let them sit there for 30 seconds, and them flip them over to boil for 30 seconds. Be careful not to boil too long or they will turn to mush. Hint: Make sure that the water stays boiling when you put the bagels in!
  11. If you want to top your bagels with stuff, do so as you take them out of the water for better sticking.
  12. Once all the bagels have boiled, transfer them to a lightly oiled baking sheet that has been dusted it with cornmeal.
  13. Preheat your oven to 425ºF. Bake for 20 minutes or until golden brown. Make sure to flip them half way through, to keep that round bagel shape. Cool on a wire rack.


Optional Toppings:
Caraway seeds, coarse salt, minced fresh garlic, minced fresh onion, poppy seeds, or sesame seeds. *Make sure to do this as you are taking the bagels out of the boiling water.*

Just in case you don’t eat all the bagels in day one here are a few tips and tricks to help keep those bagels tasting great.

Do’s

  1. Do eat bagels fresh. 😀
  2. Do share bagels with family and friends. 🙂 Sharing is the nice thing to do!
  3. Do freeze bagels to preserve their freshness.
  4. Do take caution when slicing your bagels. (be safe and use an official bagel slicer, I have a slice scar on my thumb from when I was young, I didn’t remove it from the whole in the middle before the knife came down. BE CAREFUL!)
  5. Do enjoy them with butter and/or jam.
  6. Do make breakfast sandwiches with them. (egg, ham and cheese is the best) 😀

Don’ts

  1. Don’t mix smelly bagels with non-smelly varieties in the same bag. (gross) 
  2. Don’t store salt, onion, garlic or everything bagels in a plastic bag unless freezing them. (they go soggy, gross)
  3. Don’t store bagels in the fridge. (they get hard, hockey pucks anyone!)


When Life gives you Lemons..A lemonade Story

lemonade

Simple Lemonade

We all know the old say “When life gives you lemons make lemonade.” I will admit it I use to make the lemonade that came in the powder, and there is nothing wrong with that if you want to add more than lemons to your drink. I mean yellow food coloring, lemons are yellow why do I need to add food coloring? So I stopped using the powdered stuff and started making my own.

There is nothing fancy to this and takes no time at all to make and the money you save is amazing. Sometimes when I am feeling adventurous or my kids are asking for something different I add some pureed strawberries into the mix and make strawberry lemonade.

I buy my lemons in bulk for about $3 and that give me 12 lemons, which turns into making 12 very full pitchers of lemonade or strawberry-lemonade. Or I can go to the store and buy the powdered stuff for about $4 and only get 8 (maybe) pitchers.

Lemonade

  • 1 lemons
  • 10 cups water
  • 3/4 cup sugar


Directions:

  1. Take one lemon and finely zest. Then cut in half and juice the entire lemon. Set to the side.
  2. Fill a pot with 10 cups of water. Heat on medium- high heat and pour in sugar. Keep stirring until all the sugar is dissolved.
  3. Add is zest and lemon juice and stir. Taste for sweetness/tartness. You can remove the zest after a few minutes if you want but it really helps add more lemon flavor. 
  4. Pour into a pitcher and let cool down. Or enjoy now with a glass poured over ice. 🙂

Note: To make strawberry-lemonade add 1/4 cup strawberry puree to step two before adding sugar. Since Strawberries are naturally sweet you may end up using less sugar.

I know it sounds weird to heat the water but by doing that step you are dissolving more of the sugar, so you can still make it sweet without using all that sugar. 🙂 I want my kids to be refreshed after drinking it not hyper.

Buying lemons in bulk does have it’s own set of problems. And that is using the lemons before they go bad. My simple solution is to zest, juice and slice everything a head of time and freeze in serving sizes. That way it is ready when you are and no wasted lemons.

Tips: The lemon that was used for zesting and juicing you can toss that rind into the garbage disposal and give those pipes a degreasing. Lemons have many uses, not just for lemonades!


Delicate Sweet Souffle

Triple Berry Souffle with powder sugar dusting

Triple Berry Souffle with powder sugar dusting

I’ll be honest I wanted to make this because I was bored and wanted the kids to stay quite for a minute. So I told them that any noise that they make and the souffles would fall and not be any good. 🙂 That last for a good 10 minutes. Well you can’t say I tried.

They were a lot fluffier but I opened the oven door before time. Don’t do that. They still tasted yummy. Looks don’t matter it is all about flavor.

Triple Berry Souffle

Ingredients:

  • 1/4 cup granulated sugar for souffle dish dusting
  • 1 1/3 cups whole milk
  • 1 vanilla bean, split lengthwise
  • 1/3 cup granulated sugar
  • 2 teaspoons vanilla extract
  • 1 1/2 tablespoons granulated sugar
  • 1/3 cup all-purpose flour
  • 1 1/2 tablespoons unsalted butter, softened
  • 4 large eggs, separated
  • 2 tablespoons triple berry jam or strawberry jam

Directions:

  1. Preheat the oven to 350ËšF. Brush 4 to 6 individual souffle dishes well with melted butter or spray with cooking spray. Put the sugar inside one dish and toss to coat, then tip the excess sugar into the next dish and repeat. Place the dishes in the refrigerator to chill.
  2. Place the 1 cup of milk in a large saucepan. Scrape out the seeds from inside the vanilla then add the vanilla bean and seeds, heat just to a boil, then turn off the heat and set aside to let the vanilla bean infuse for 10 minutes. <- Be careful not to scald the milk. I did this three times.
  3. In a medium bowl, whisk the 1/3 cup granulated sugar, vanilla extract, the flour, triple berry jam and the reserved 1/3 cup milk until well combined.
  4. Remove vanilla bean. Add a little of the hot milk and whisk to combine, then add the flour mixture to the hot milk mixture in the saucepan. Bring to a simmer over medium heat, whisking occasionally. Simmer just until thickened, about 1 minute. Turn off the heat. Add the butter, stir, cover, and set aside 15 minutes.  Whisk in the egg yolks.
  5. In a mixer fitted with a whisk attachment (or using a hand mixer), whip the egg whites in a clean dry bowl until soft peaks form. Add the remaining 1 1/2 tablespoons sugar and continue whipping until stiff and glossy. Fold into the milk mixture. <- You don’t want to see any white streaks running through the mixture.
  6. Pour the mixture into the prepared dishes, filling them 3/4 full. Bake in the center of the oven until puffed and light golden brown, 20 to 30 minutes.*** Do not open the oven door unless absolutely necessary. Again I learned this the hard way.***

Over Flowing Chocolate Lava Cakes

Chocolate Lava Cake

Chocolate Lava Cake

Rich chocolate cake with a warm chocolate melting center with fresh whip cream on top. My mouth is watering just thinking about it. Anyone who knows me, knows I have a sweet tooth. I get it from my dad! I love chocolate, well only if it is not ruined by nuts. I have enough nuts in my family I don’t want to eat them too. LOL 🙂

Nothing beats homemade bake goods and this is so rich with chocolate it should be sinful.  These look so hard to make but are so super easy. When looking up recipes and ideas I ran across different temperatures, times, etc. There are so many different way to make these. So I combines several and came up with this. This recipe make 5 so if you don’t want to share make them when no one is around cause they will be gone.

Over Flowing Chocolate Lava Cakes

Ingredients:

  • 4 oz  Semi-sweet chocolate baking bars
  • 1/2 cup butter
  • 1 cup powdered sugar
  • 2 whole eggs
  • 2 egg yolks
  • 1/4 cup + 2 TBS flour
  • 2 ts vanilla extract

Directions:

  1. Preheat oven to 425ËšF.
  2. Spray down custard cups generusly with cooking spray and dust with a little cocoa powder, place on a cookie sheet.
  3. Melt butter and chocolate in a double boiler. Whisk until smooth.

    Chocolate bar and butter melting in a double boiler.

    Chocolate bar and butter melting in a double boiler.

  4. Stir in sugar. Mix until well combined. Whisk in vanilla, eggs and egg yolks, combine completely. Add in flour.

    Sugar, eggs, vanilla, salt and flour have been added to the chocolate mixture.

    Sugar, eggs, vanilla, salt and flour have been added to the chocolate mixture.

  5. Divided chocolate mixture between the custard cups.

    Fill cups about 3/4 of the way.

    Fill cups about 3/4 of the way.

  6. Bake for 12-14 minutes until the sides are set and the center is still soft. The cakes will be done if the knife comes out clean from the edges and the center is still soft.
  7. Let stand for 1 minute before removing from cups.
  8. Invert cups on to plates and serve. <- whip cream, ice cream or strawberry sorbet would be great to have on the side of this little chocolate heavens. Or even a simple dusting of powdered sugar makes a great topping.

    Chocolate Lava Cake

    Chocolate Lava Cake

Freshly Baked Citrus Cranberry Cookies

I love the cold months, it gives a break from the heat of the summer and we get great fruits like cranberries and amazing tasting oranges. A friend of mine grows his own oranges, satsumas and chickens. Needless to say I am never out of fresh fruits during the colder months of the year. Well over the holidays my oldest had to take care of the chickens and dogs while they are away. And we got so many fruits and eggs I just had to warm up my oven and get to baking. I was not letting these go to waste.

I love the taste of oranges and cranberries together. These are the prefect balance between tart and sweet. I dare you to just eat one! Trust me it can’t be done.

Cranberry Citrus Cookies

Ingredients:

  • 1/2 lb unsalted butter, at room temperature (two sticks)
  • 1/2 cup packed light brown sugar
  • 1 egg yolk
  • 1 large orange finely grated zest
  • 2 cups all-purpose flour
  • 1/4 teaspoon salt
  • 2 teaspoons orange juice
  • 3/4 cup dried sweetened cranberries, finely chopped

Directions:

  1. With an electric mixer, beat butter and brown sugar until light and fluffy. Beat in egg yolk and orange zest and juice.
  2. Combine flour, salt and cranberries. Gradually stir flour mixture into butter mixture, blending until smooth. Form dough into a log and wrap with plastic wrap. Refrigerate for dough 60 minutes to make it easier to handle.
  3. Cut into desired shapes and thickness with lightly floured cookie cutter or knife. Keep the remaining dough in the refrigerator in between baking batches.
  4. Preheat oven to 350°F. Place cookies on ungreased or parchment line cookie sheet  and bake until lightly golden around the edges, 8 to 10 minute.

Simply Swirled Delights


I  love cinnamon buns! I love how they make your house smell like cinnamon and nothing beats fresh treats from the oven! When you have a house filled with kids buying the pre-made ones is not a great option, but making them does!  And I better you already have everything in you kitchen cabinets too. There is nothing tricky about these to make. So simple and easy. The only hard part is waiting, especially when you start to smell the cinnamon baking in the oven.
Simply Swirled Delights
Ingredients:
  • 2 and 1/2 cups all-purpose flour
  • 3 Tablespoons granulated sugar
  • 1 teaspoon salt
  • 1/2 ounce of yeast, I used
  • 1/2 cup (120ml) water
  • 1/2 cup heavy cream
  • 1 large egg
  • 1 teaspoon vanilla extract

Filling:

  • 3 Tablespoons unsalted butter, melted
  • 2 Tablespoons ground cinnamon
  • 3/4 cup granulated sugar
  • 1 teaspoon vanilla extract

Icing:

  • 1 cup powder sugar
  • 1 teaspoon vanilla extract
  • 1 Tablespoon water

Directions:

  1.  In a large bowl, toss the 2 and 1/2 cups flour, the sugar and salt together until evenly dispersed. Set aside.
  2. In a small bowl combine warm water (115 degrees) and yeast. Allow to sit for ten minutes.
  3. In a small sauce pan heat heavy cream and vanilla in a small over medium heat.  Stir the milk mixture into the flour mixture. Add the egg and yeast mixture to the flour/milk mixture. Dough will be ready when it gently pulls away from the side of the bowl and has an elastic consistency. You may need to add extra flour if the dough is too sticky.
  4. On a lightly floured surface, knead the dough for about 3-4 minutes. Place in a lightly greased bowl and let rest for about 10 minutes.
  5.  After 10 minutes, roll the dough out in a 14×8 inch rectangle. Spread the softened butter on top. Mix together the cinnamon and sugar and sprinkle it all over the dough. Add more cinnamon/sugar if desired. Roll up the dough tightly. Cut into 1 1/2 inch pieces and place in a lightly greased 9-inch round pan. Loosely cover the rolls with aluminum foil and allow to rise in a warm, draft-free place for 1 hour. Here is what I do: heat the oven to 170F degrees. Turn oven off. Place rolls inside oven and allow to rise.
  6. After the rolls have doubled in size, preheat the oven to 375F. Bake for 25-30 minutes until lightly browned. Covered the rolls with foil after 15 minutes to avoid heavy browning.
  7. To make icing mix powder sugar, vanilla and water until smooth. Poor over hot cinnamon rolls.

Easy Chewy Granola Bars

Chewy Granola Bar


A few years ago I fell in love with a granola bar and with in six months of me finding it they stopped selling it. It’s that the way it happens though. They were this perfect combination of chocolate, fruit, salty, and crunchy. I just had to find away to have them again. I have tried to make granola bars several different times, they all came out crunchy and never stuck together very well. I had to find away and one night I did. I was nervous but since they were gone in less then 48hrs I think they were a huge hit.

Chewy Granola Bars

  • 2 c oats ( I used the one minute quick cook oats, but didn’t cook them)
  • 1 c rice Krispie cereal
  • 1 c preztels, broken into pieces
  • 2/3 c light brown sugar
  • 1/3 c honey
  • 2 ts cinnamon
  • 2 TBS almond slivers
  • 1/4 c dried cranberries
  • 1/4 c butter
  • 3/4 c chocolate chips (I used a mix of semi-sweet and milk chocolate)

Directions:

  1. Line a 9×13 inch pan with parchment paper.
  2. Mix all the dry ingredients in a large bowl. Set to the side.
  3. In a small sauce pan over medium heat combine all the wet ingredients. Heat until all the sugar is completely melted.
  4. Once the sugar is completely dissolved, remove from heat and combine with the dry ingredients. Mix well.
  5. Press mixture hard and evenly into the prepared pan. Place in fridge for about 30 minutes.
  6. In a small bowl melt chocolate chips. You can use the double boiler method or the microwave heating in 10 second intervals. Once the chocolate is melted pour over the granola and spread out evenly. Place back in fridge until chocolate has set. Then cut into bars or squares. Enjoy